
Model, effort and mode
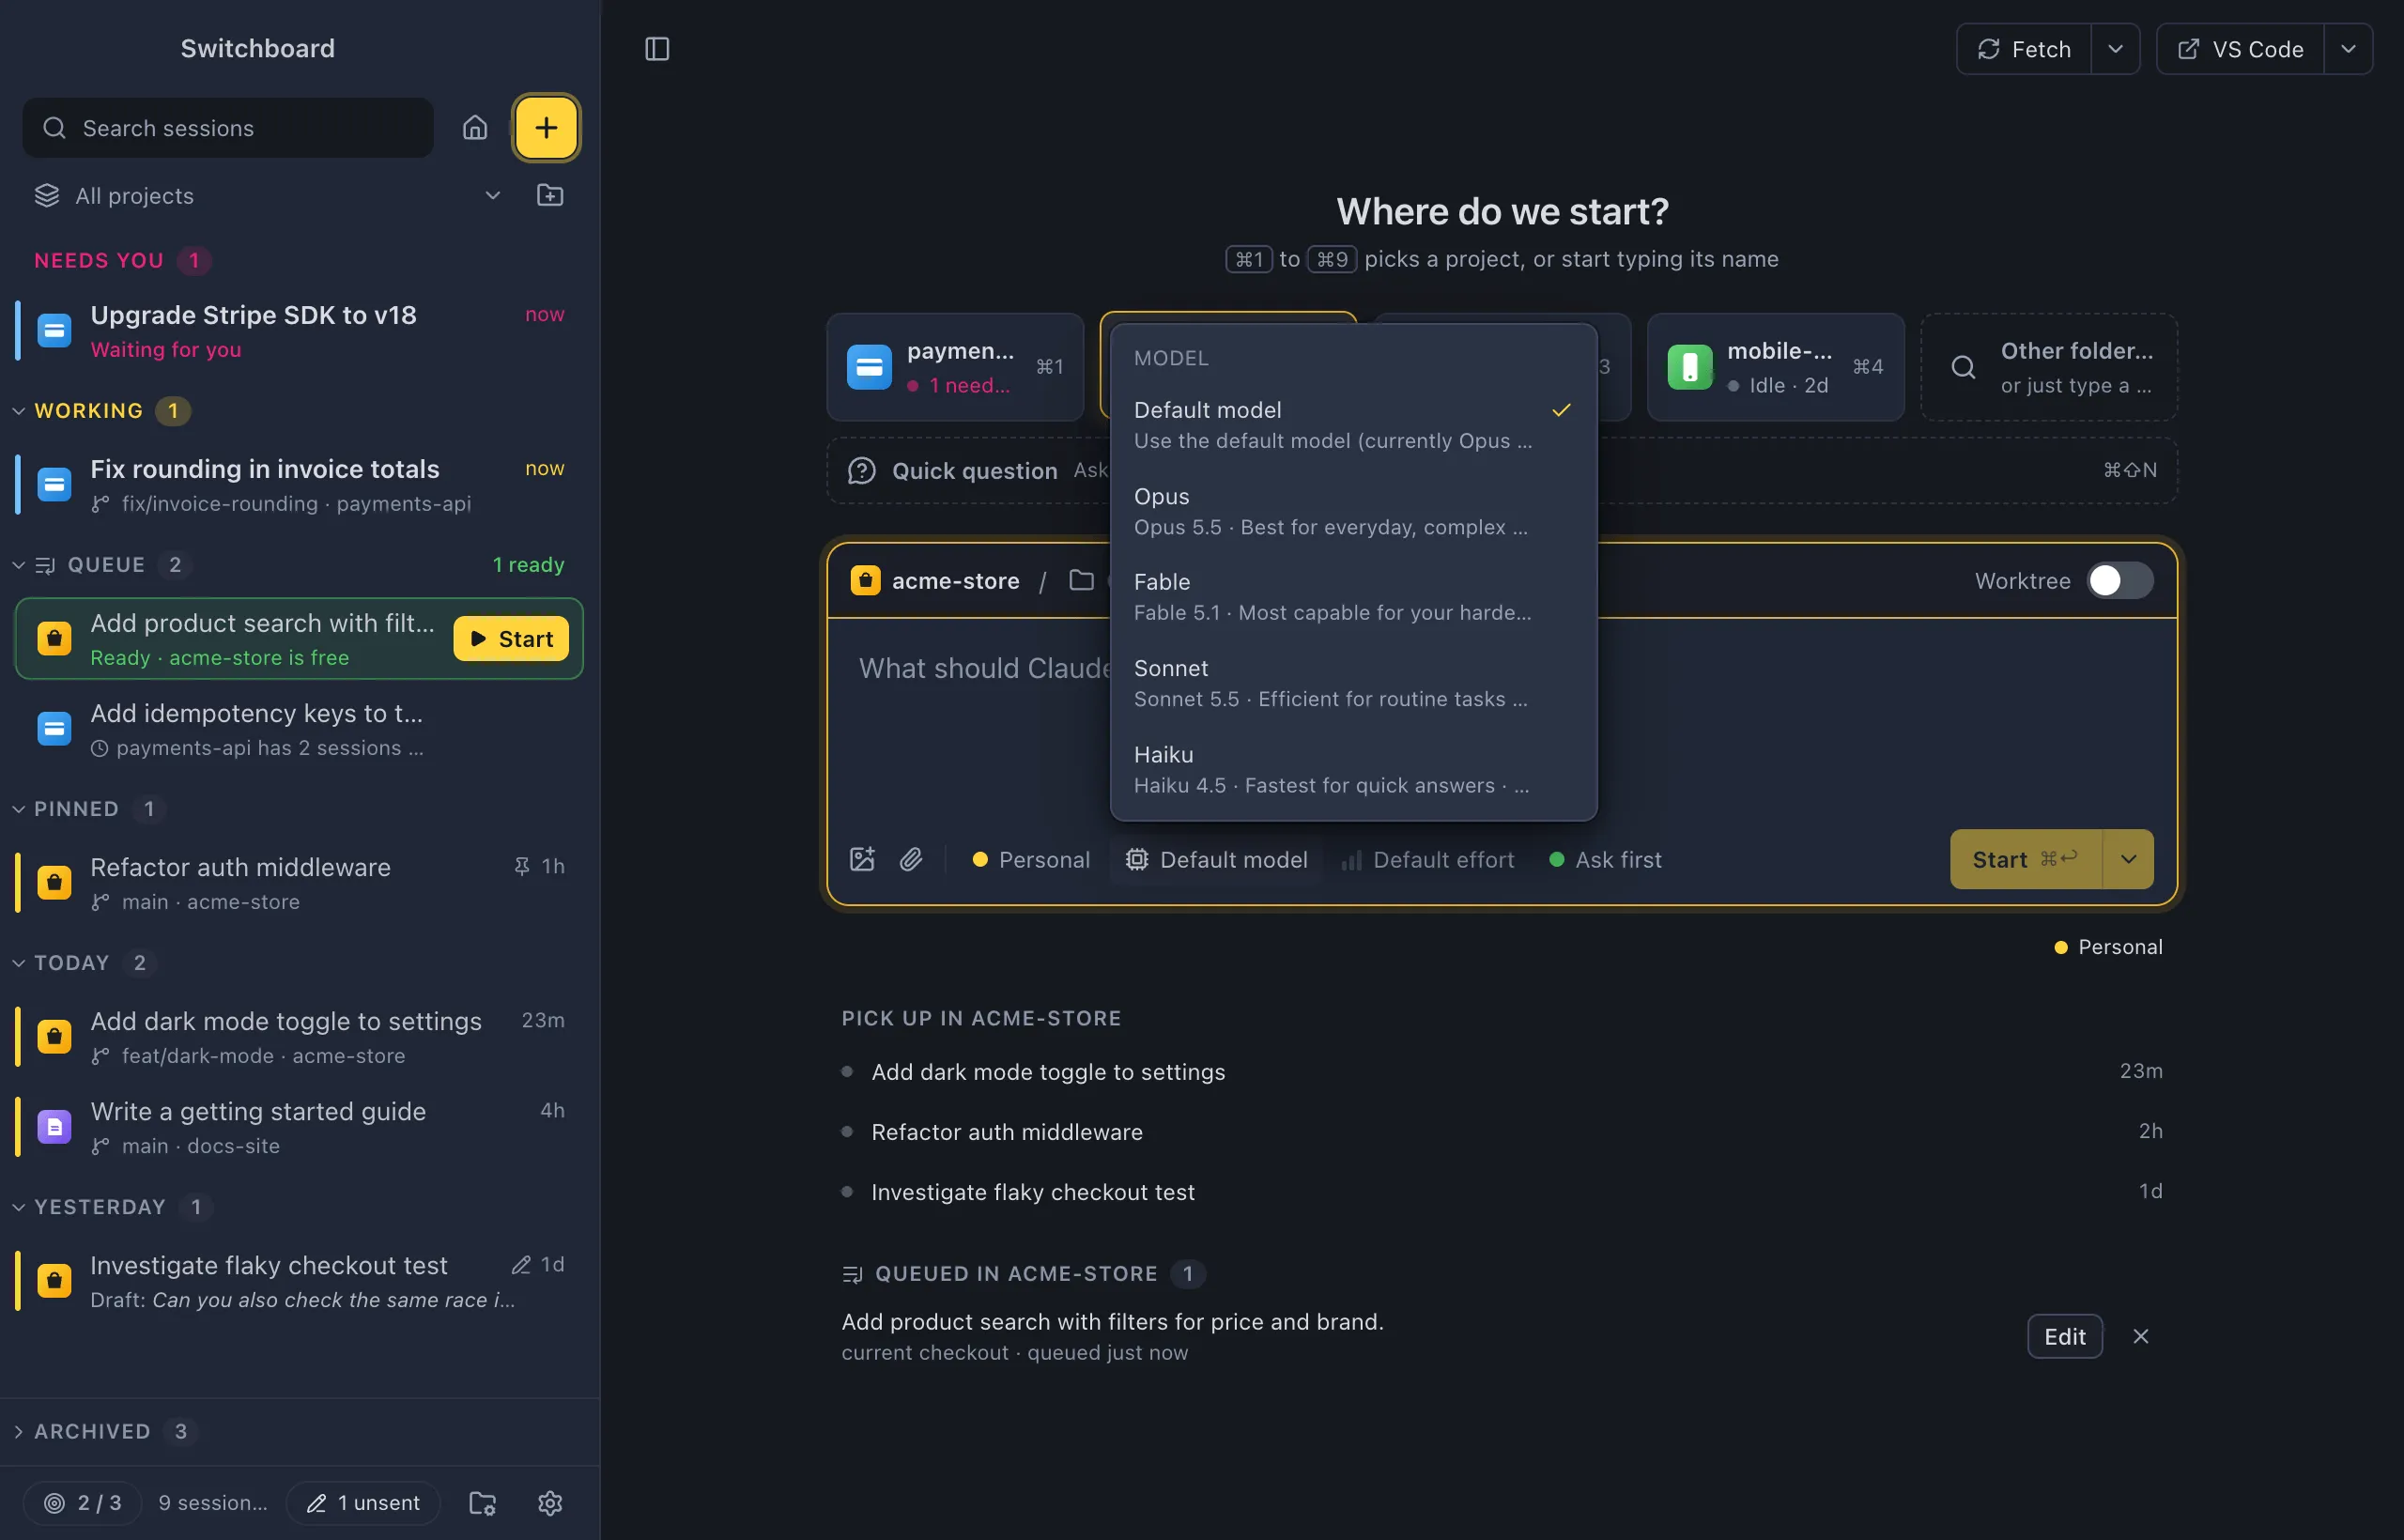
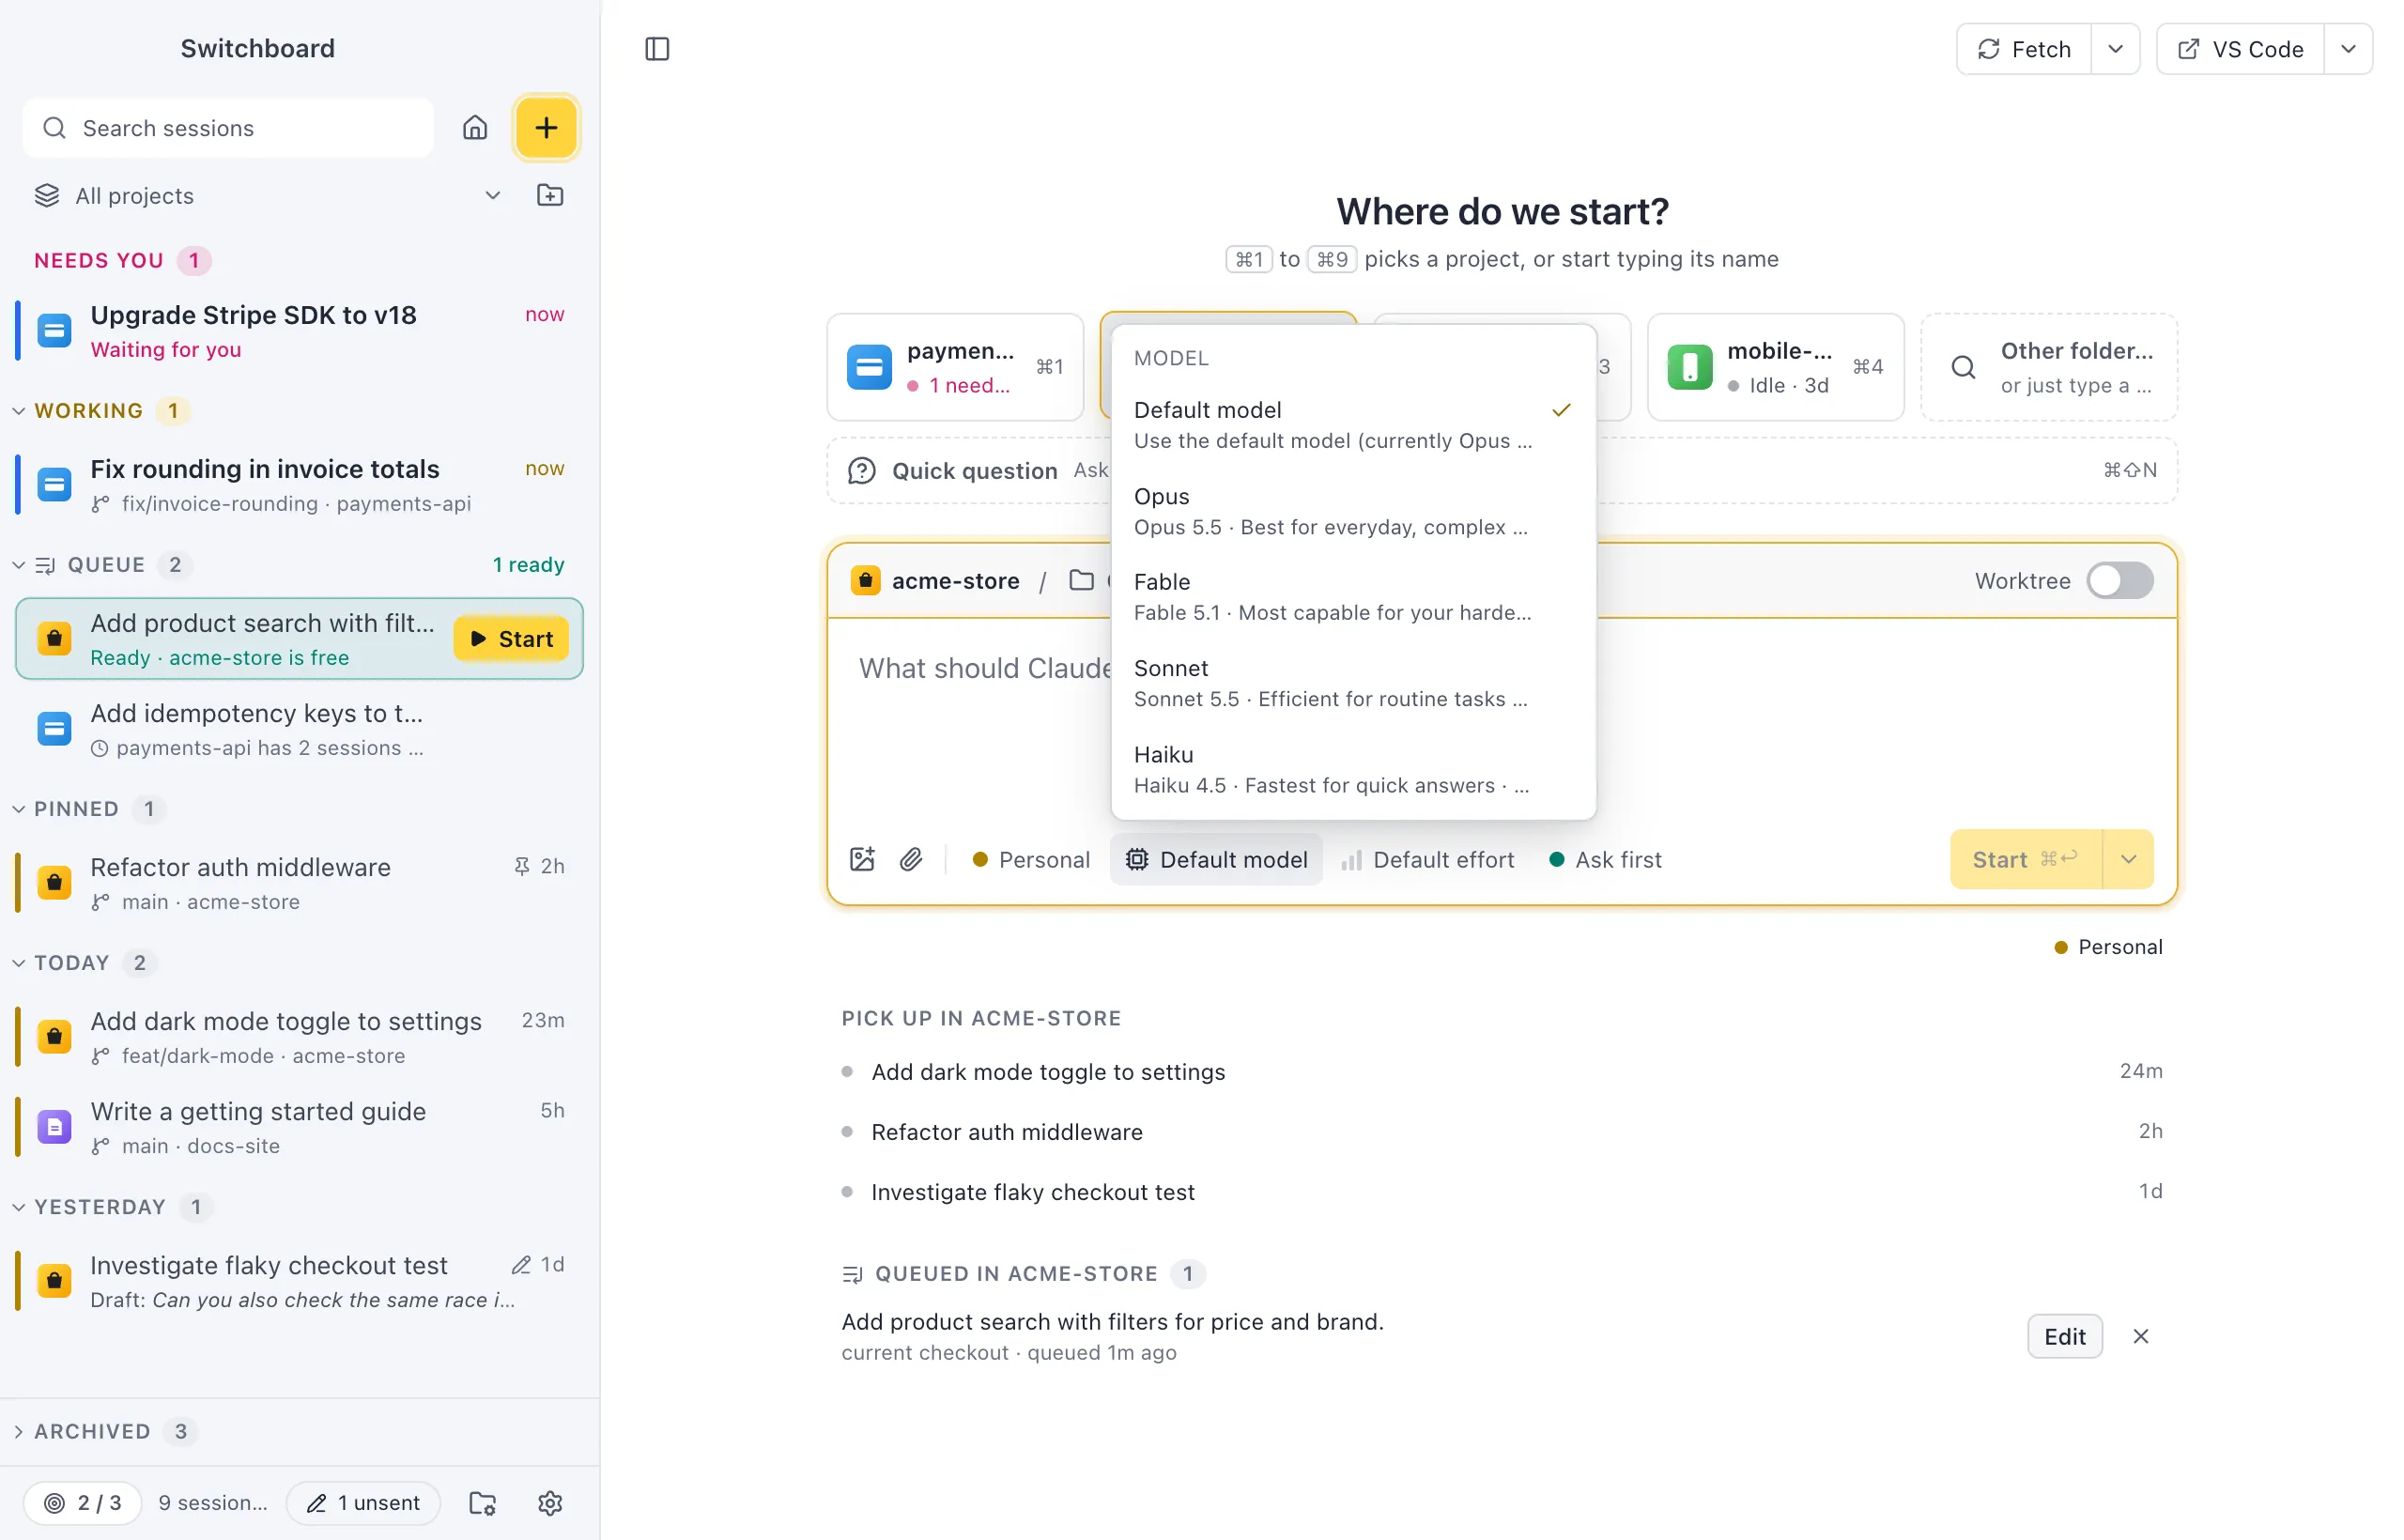
Under the message box sits a row of quiet chips: the Claude profile, the model, the effort and the permission mode. They show only the value (“Personal”, “Opus 4.5”, “Medium”, “Auto”); hover one for its full meaning, such as “Effort: Medium”. The same row is in New session, in the command palette’s New session step and in every session.
Where to find it
Section titled “Where to find it”- In New session, under the message box. The chips start from the project’s defaults.
- In a session, under its message box. Changes apply while the session runs.
- In the command palette, with a session open: Change model…, Change effort… and Change permission mode….
Click a chip to open its menu above it. The image and attach buttons come first in the row, then a thin line, then the chips.
Profile
Section titled “Profile”With more than one Claude profile, the first chip is the profile, as its colour dot and name. In New session you can pick another profile for one session; the menu marks the project’s own as “(project)” and the default as “(default)”.
A running session keeps its profile. Its chip shows the profile and links to Manage profiles…; start a new session to use another one. With a single profile the chip is hidden.
The model chip lists Default model (what Claude Code would pick) and the models your Claude Code offers, each with a short description. The chip shows the name without “Claude”, such as “Opus 4.5”.
Effort
Section titled “Effort”How much Claude thinks before it answers. The chip shows three bars that fill with the level:
| Choice | Bars |
|---|---|
| Default | What Claude Code would pick |
| Low | one |
| Medium | two |
| High | three |
| Extra high | three, in the accent colour |
| Max | three, in the accent colour |
In a session the effort chip shows only when the model has an effort setting.
Permission mode
Section titled “Permission mode”The mode decides when Claude stops to ask before it acts. The menu, under the heading Permissions, offers four modes:
| Mode | Chip | What it means |
|---|---|---|
| Ask before edits | Ask first | Approve every edit and command. The default. |
| Accept edits | Accept edits | File edits apply, commands still ask. |
| Plan mode | Plan | Claude reads and plans, and makes no changes. It shows you the plan to approve. |
| Auto mode | Auto | Claude only asks when it matters. |
Each mode has a dot in the chip: green for Ask first, blue for Accept edits, grey for Plan and yellow for Auto. A session started in another mode elsewhere (such as bypassing permissions) shows that mode in the menu too, but Switchboard never offers it.
Press Shift, TabShift, Tab in the message box to switch mode. Like the Claude Code CLI, it cycles through Ask before edits, Accept edits and Plan mode. Pick Auto mode from the menu.
What the cards look like when Claude asks: Permissions and questions.
In a narrow window
Section titled “In a narrow window”When the row runs out of room, it never cuts a chip off. It steps through fixed levels instead:
- Effort and mode show only their icon (the bars and the dot).
- The model drops its version (“Opus” instead of “Opus 4.5”).
- The profile shows only its dot.
The label and tooltip keep the full value at every level. This happens in narrow windows and when two sessions are side by side.
Project defaults
Section titled “Project defaults”New session starts from the project’s defaults for model, effort and mode, and from the choices you made last in New session for whatever the project leaves unset. A change in New session applies to that one session.
To keep your choices for the project, choose Save as project default in the Where menu of the route strip, or run Save as project default in the command palette. You can also set them on the project’s Settings tab. Quick questions keep their own choices, apart from your projects.
Settings
Section titled “Settings”The defaults live on each project’s Settings tab. Profiles are in Settings → Claude profiles.